
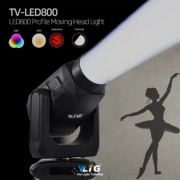
In the realm of lighting technology, versatility, reliability, and performance are paramount. Enter the VLTG LED800 Moving Head Light, a powerhouse of innovation designed to meet the diverse needs of lighting designers and event professionals.
Compact Design, Powerful Performance
The LED800 boasts a compact design, weighing a mere 29.8KG, making it a portable yet potent lighting solution. Available in both high brightness and high CRI versions, this fixture offers unparalleled performance at an exceptional value.
Equipped with a formidable 750W White LED Engine, the LED800 delivers an impressive 4451.0 lm output with a BEAM Angle of 20°. But its capabilities extend far beyond raw power. With features like 1 fire effect wheel, 2 GOBO wheels, and TWO PRISM OPTIONS, alongside variable CMY color mixing and CTO color temperature correction, it empowers designers to unleash their creativity with precision and control.

Thanks to variable CMY mixing and CTO color temperature control (ranging from 6500K to 3200K), lighting designers using the LED800 can craft any color palette imaginable. The fixture also offers a color wheel loaded with six filters, including CTB 5600K and High CRI filters, ensuring vivid and accurate color rendering for any application.


1 color wheel: 6 colors + half color effect

CTO can realize linear adjustment of color temperature
Here are seven key advantages of choosing the LED800:
1、Compact Design: The size is compact among similar products, the appearance is beautiful, and the bottom is exquisitely designed.
2、Durable High-Power Light Source: Long-lasting 750W LED module. With a lifespan exceeding 20,000 hours, ensures stability and durability.
3、Customizable: Available in both ordinary CRI and high CRI versions to suit diverse needs.
4、Uniform Light Spot: Clear and sharp gobos with pure colors, offering versatile effects.

1 fixed gobo wheel with 8 gobos

1 rotating gobo wheel with 6 replaceable gobos
5、High Cost-Performance: Integrates beam, gobo, washing, and framing into one, offering exceptional value.
6、Large Angle Range: Adjustable from 4.5 to 50 degrees with an 11x zoom, adaptable to various settings.

7、Selectable Noise Mode: Offers noise management options for use in any environment.
8、Moreover, with 4 blades that move separately and a rotation range of +/- 45°, the LED800 ensures precise control and seamless transitions for any lighting scenario.

its multifunction makes it equally suitable for installations in venues ranging from concert halls to nightclubs, theaters to churches.
Whether it’s the vibrant hues of a concert stage or the subtle ambiance of a theatrical production, the LED800’s customizable lighting capabilities cater to a myriad of artistic visions. Its durable high-power light source ensures reliability and longevity, making it an ideal choice for rental companies and event productions seeking maximum versatility.


